MockFlow allows you to collaborate with others by sharing your projects with different permission levels. The projects can be shared directly from Design Space or from inside the MockFlow WireframePro Editor or inside the MockFlow IdeaBoard editor.
When inviting teammates, you can assign them different roles based on the level of access you want to provide. Each role defines what actions they can view, create, or manage within the space.
Below is an overview of the available roles and their permissions.
- Reviewer: Can view all projects in the space, add feedback, and export UI projects.
- Co-editor: Can create new projects, and also edit, rename, and sort all projects in the space.
- Admin: Has full control over the space and can also share it with others. However, the admin cannot delete or transfer ownership of the space.
Sharing Project in Design Space
To learn how to share projects in Design Space, refer to this article. You can also share a project using a public link — see this article for details.
Sharing the project inside the MockFlow Wireframe editor
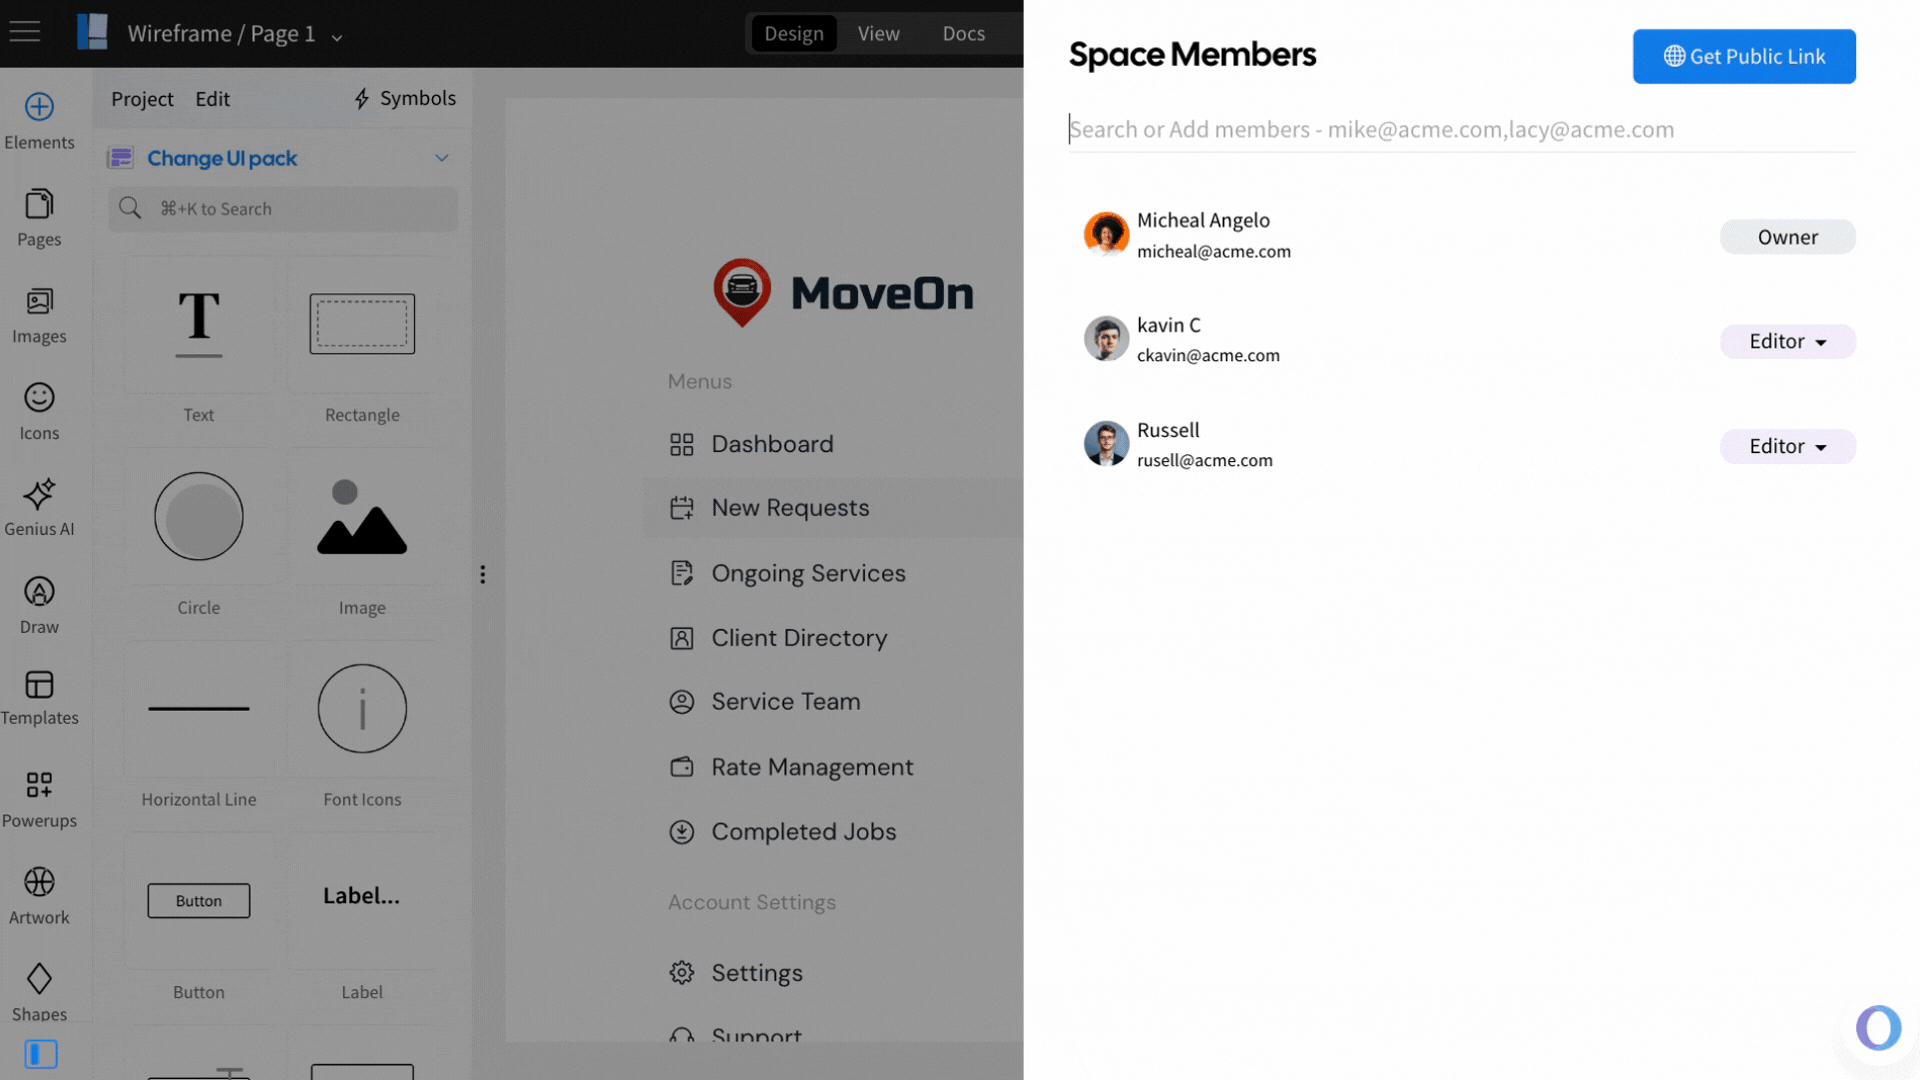
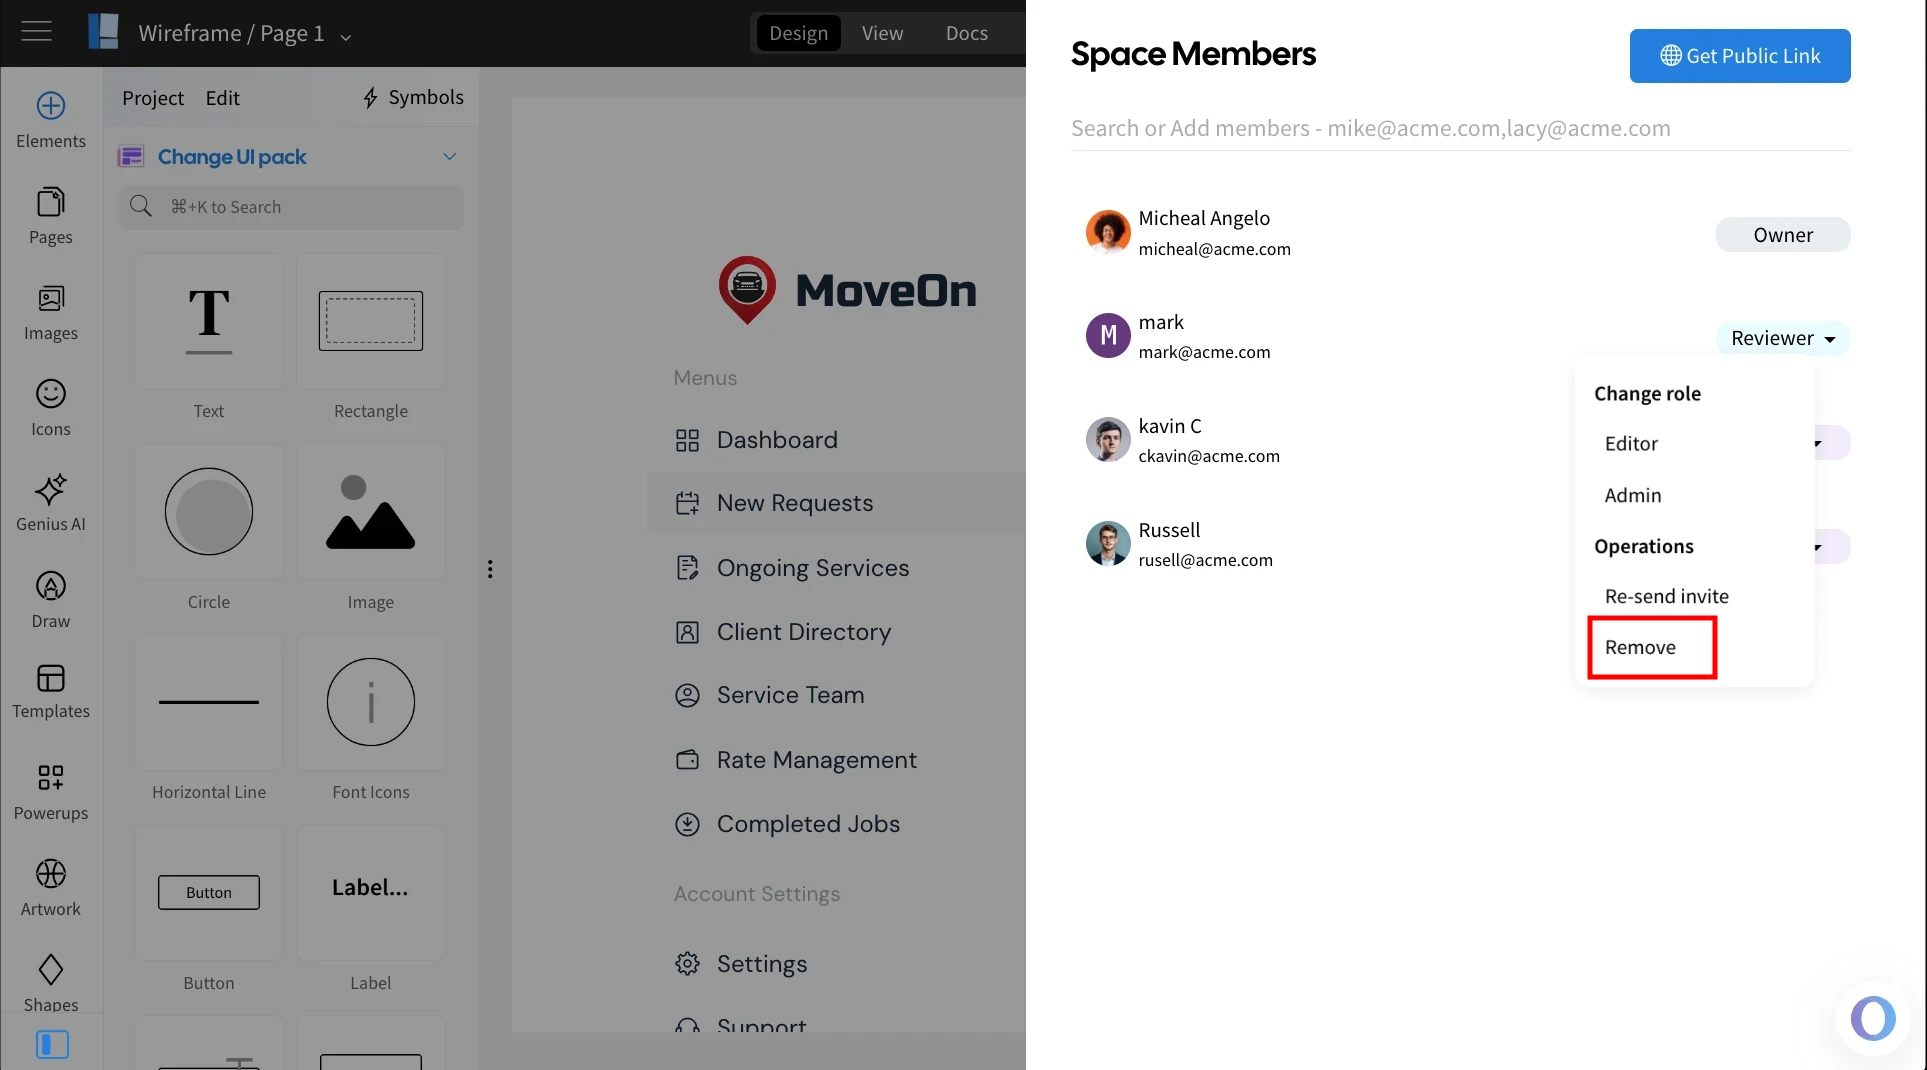
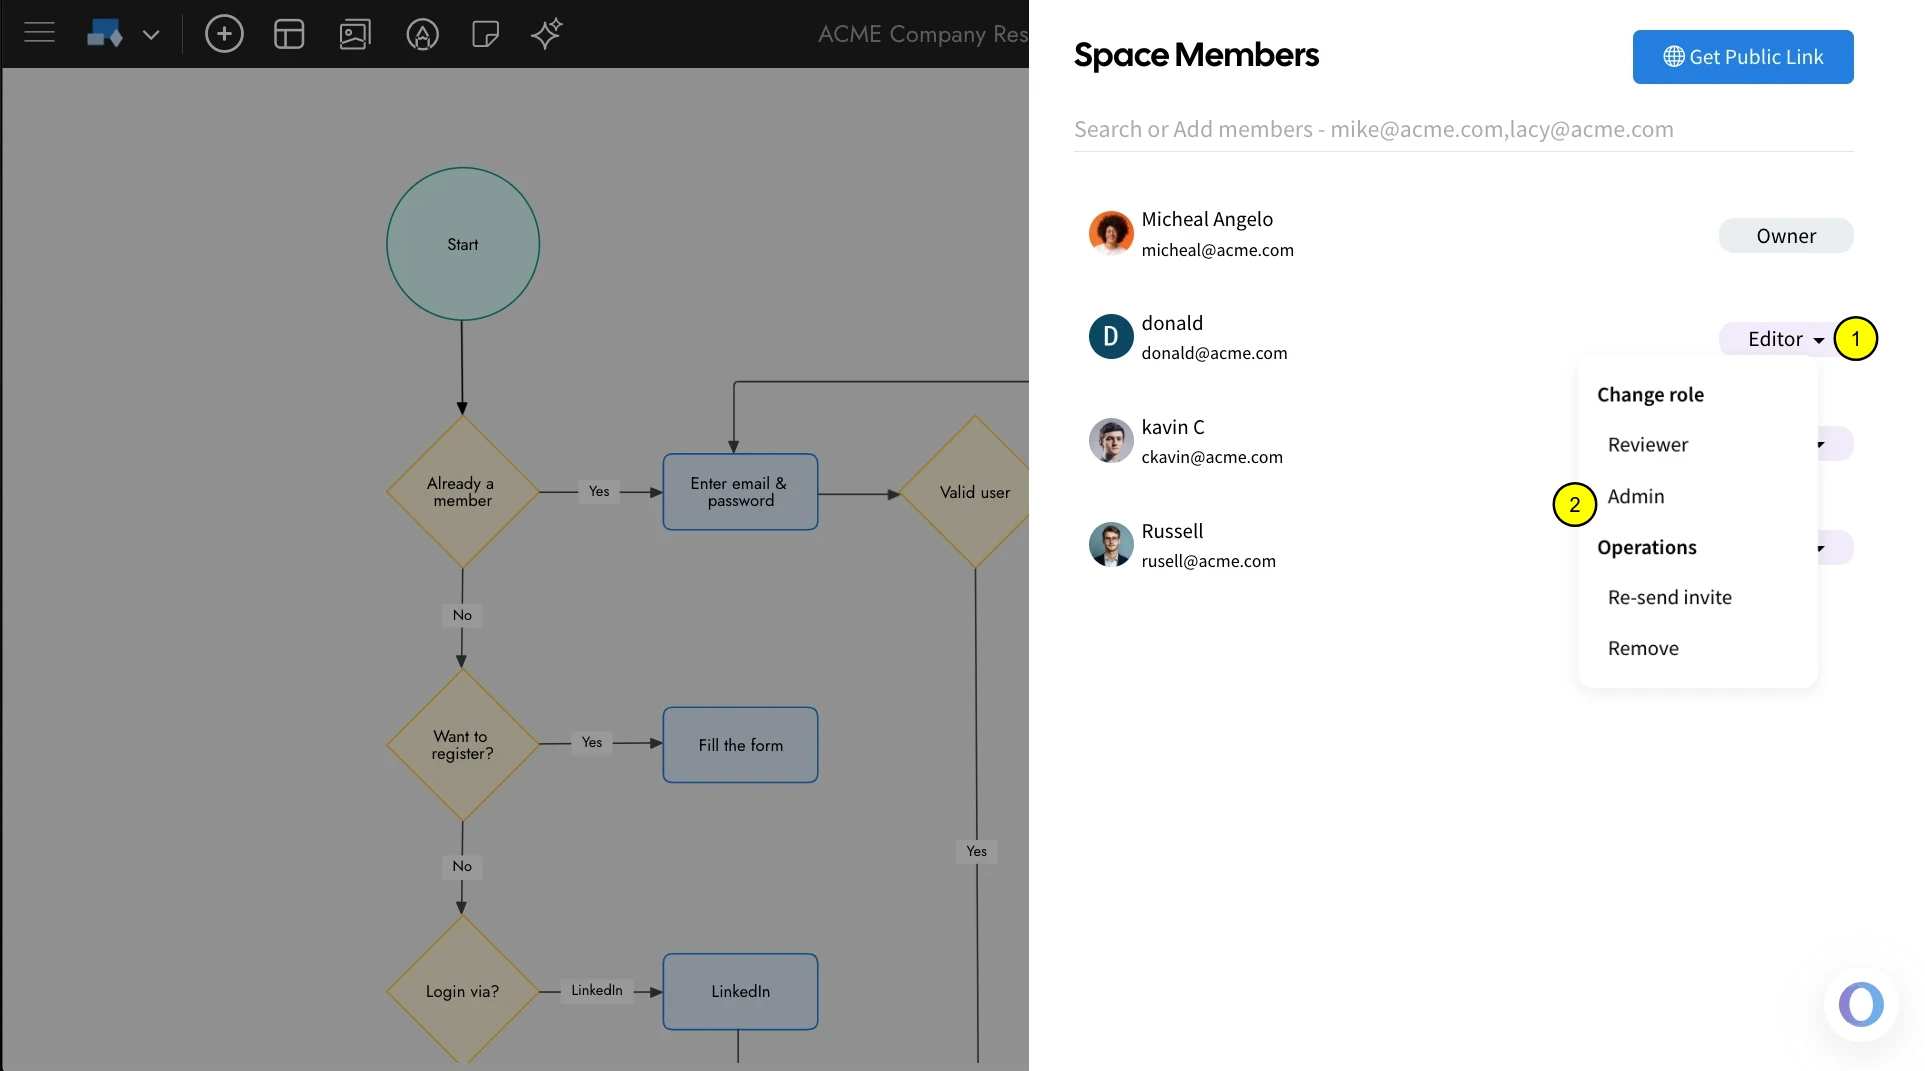
1In the MockFlow WireframePro editor, click Team Members from the top-right corner.
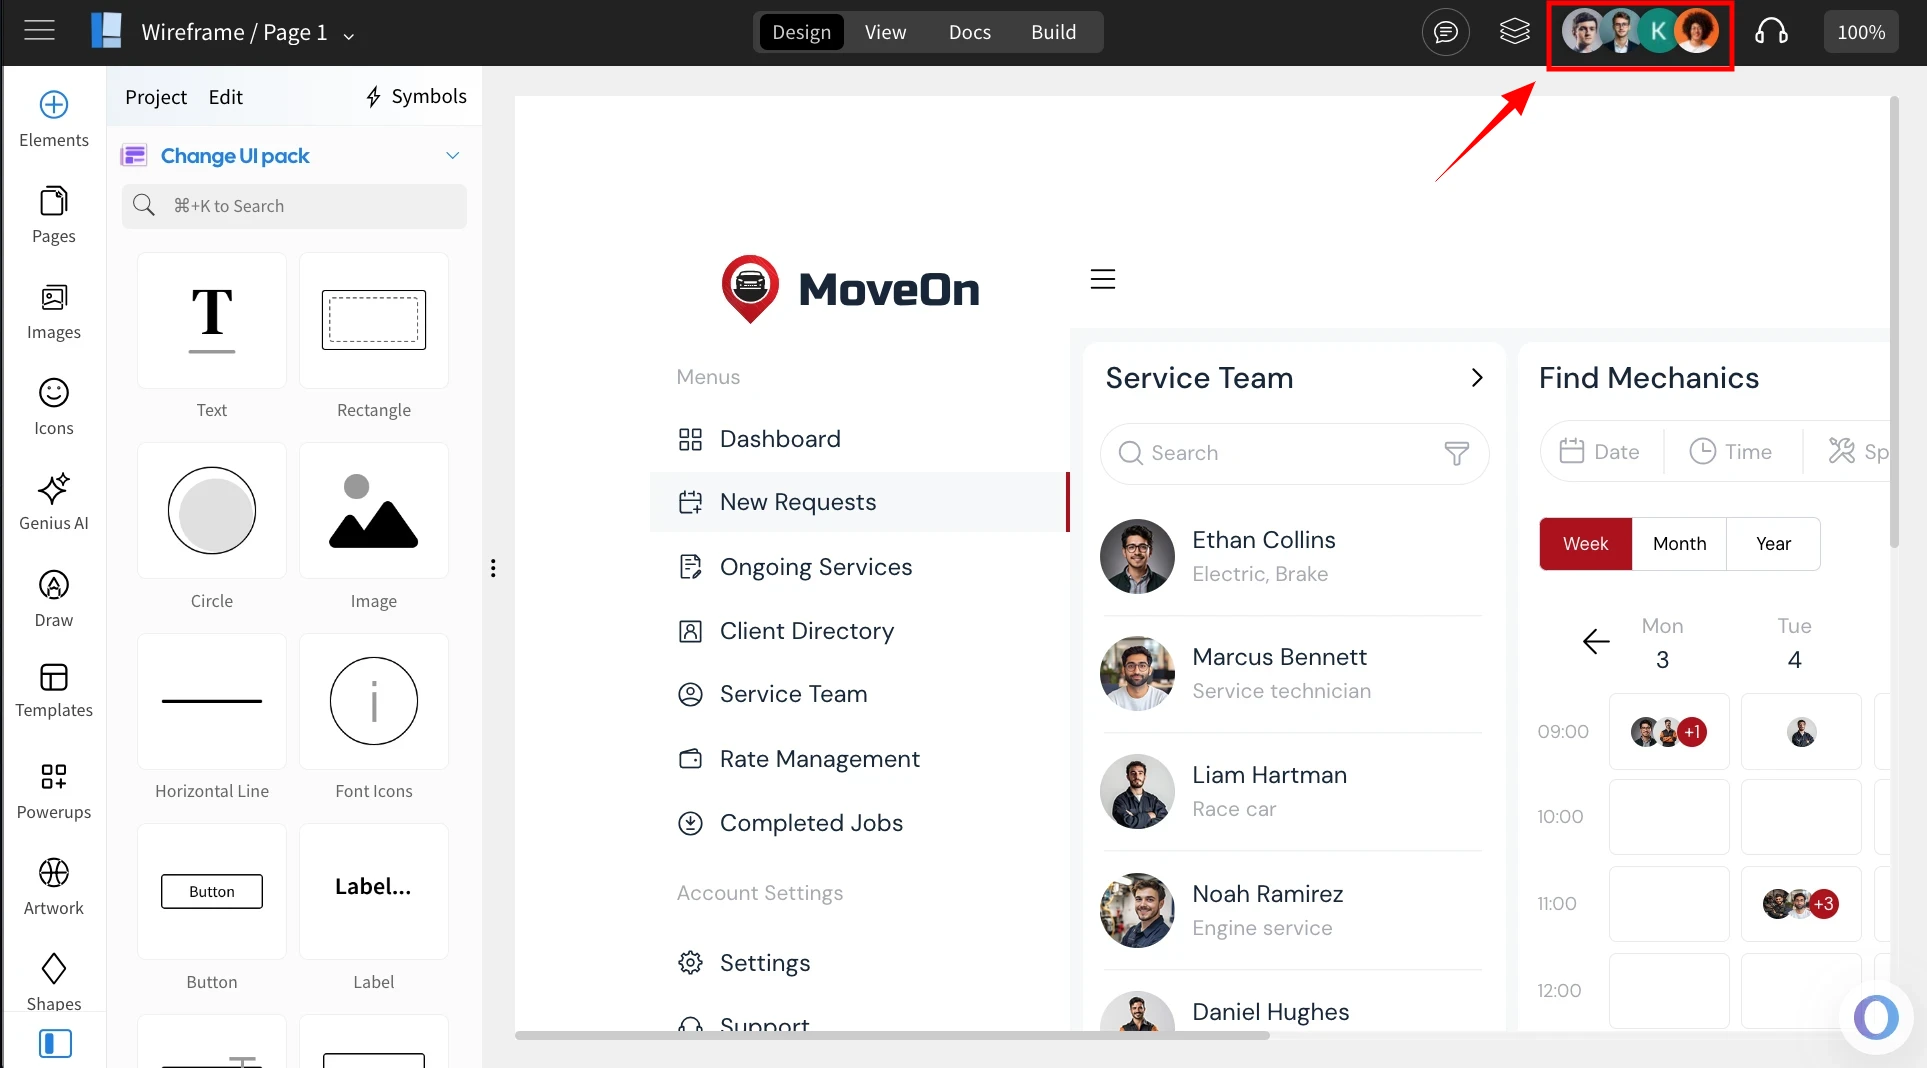
2Enter the email address of the member you want to add.
3Select the appropriate role from the available list.
4The member will be added to the space, and you can change their role anytime using the role dropdown.

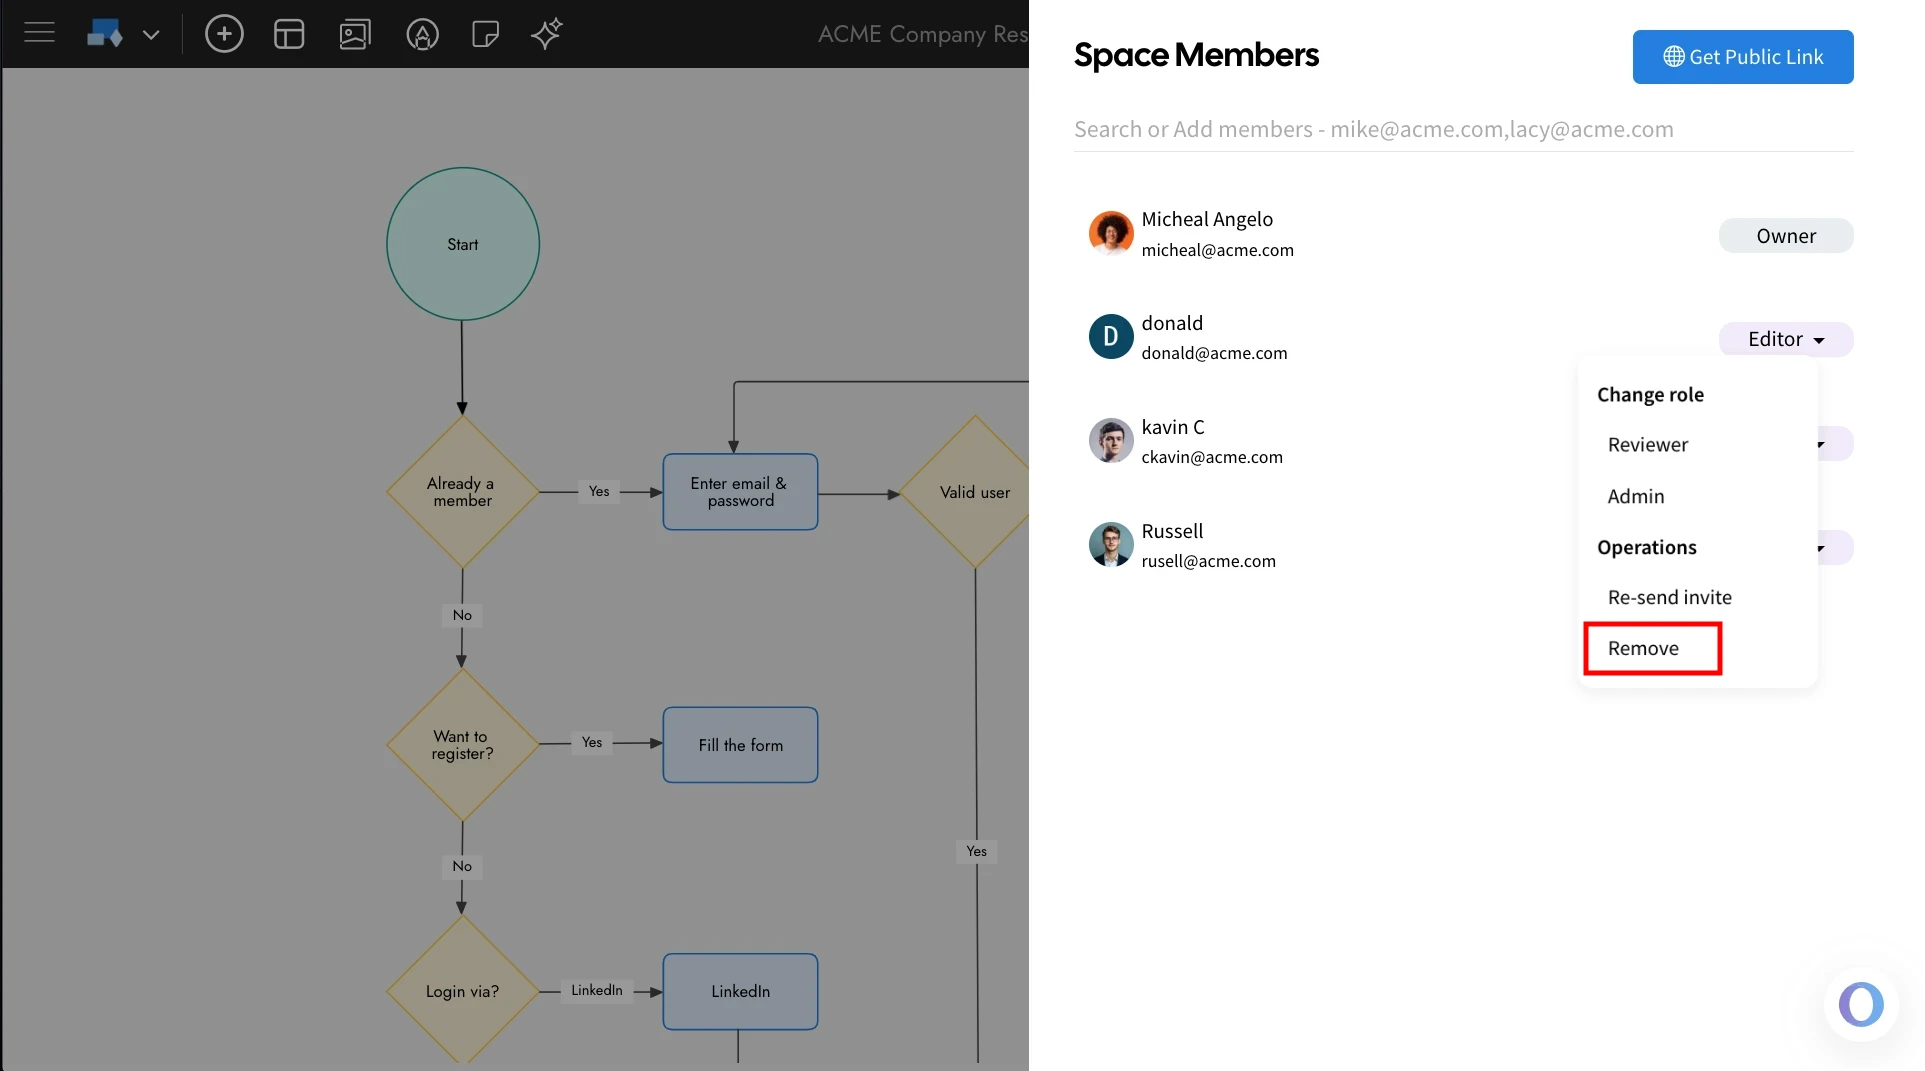
5You can also remove a member from the space using the remove option.
Generate Public Link inside the MockFlow WireframePro editor
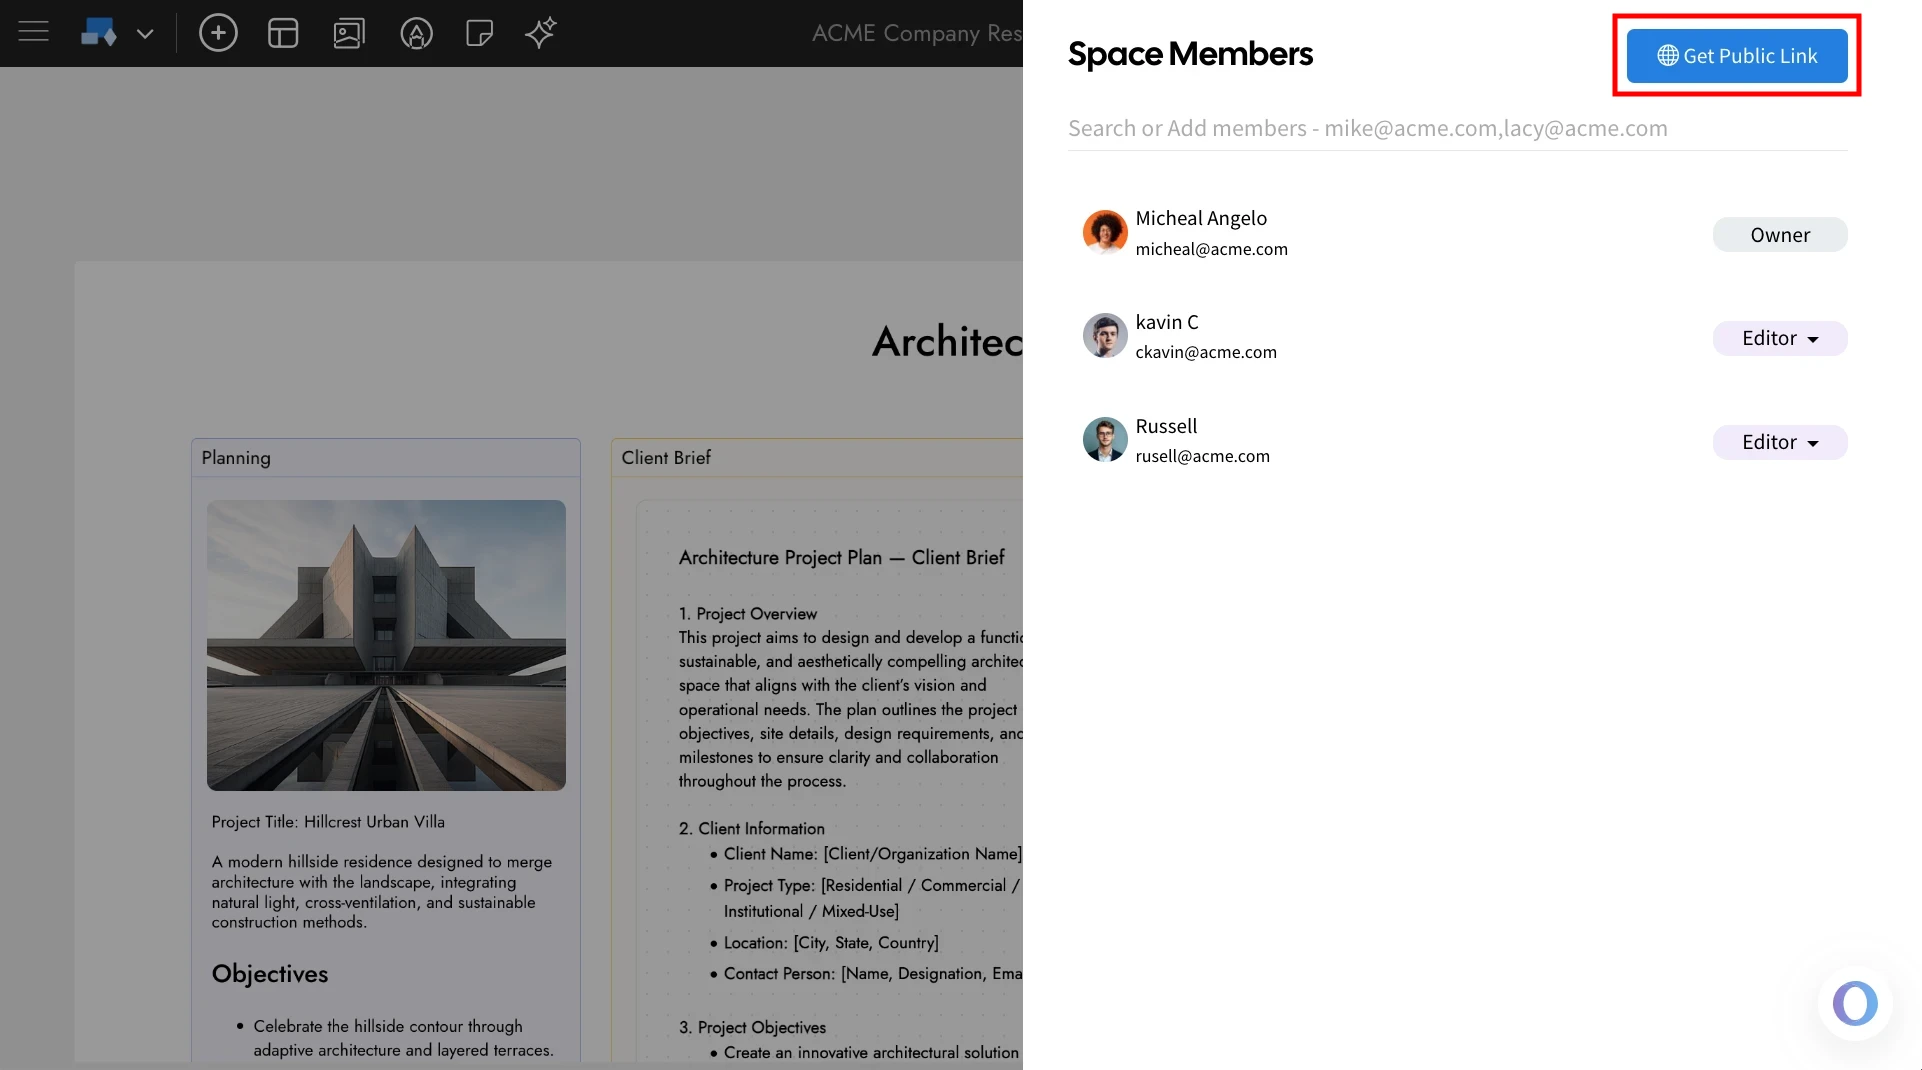
1To generate a public link for a project, open the Team Members panel and click 'Get Public Link.'

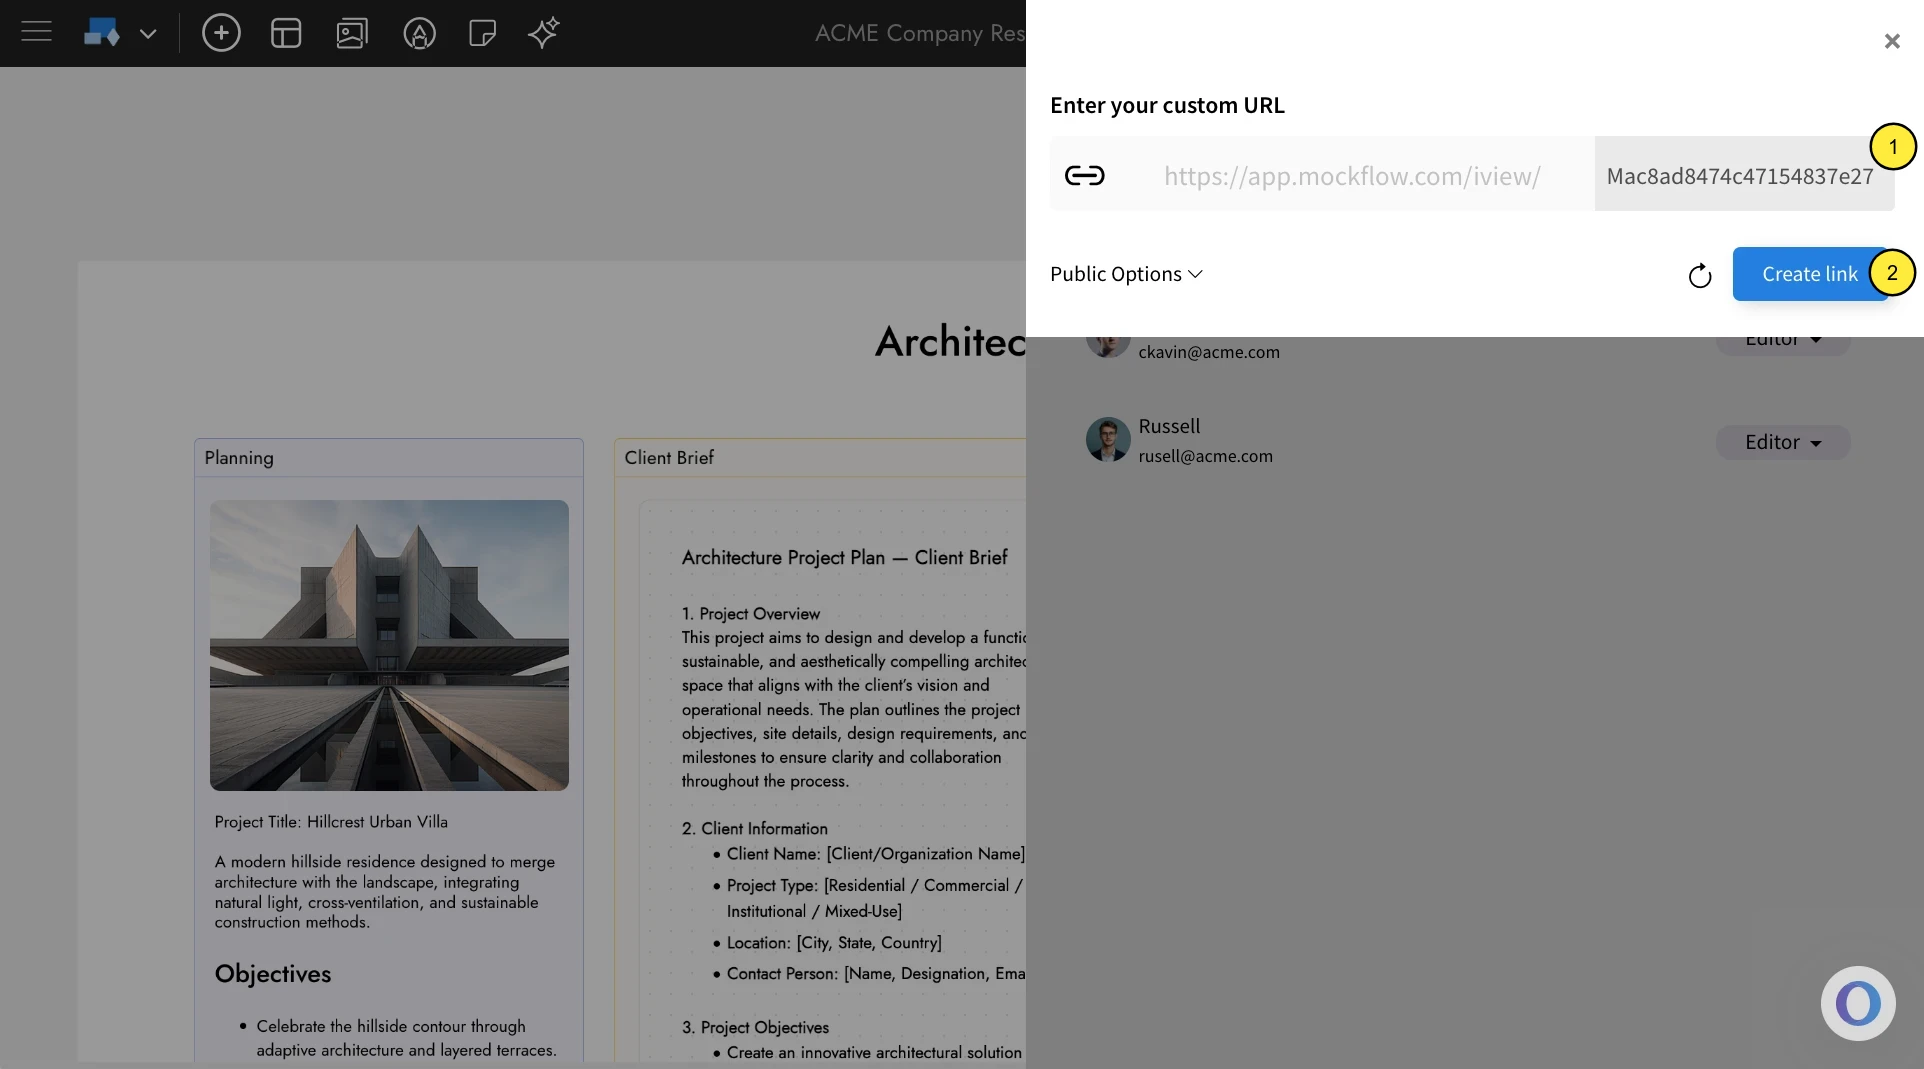
2Set the default view from the available options, adjust the link settings as needed, and then click 'Create Link.'
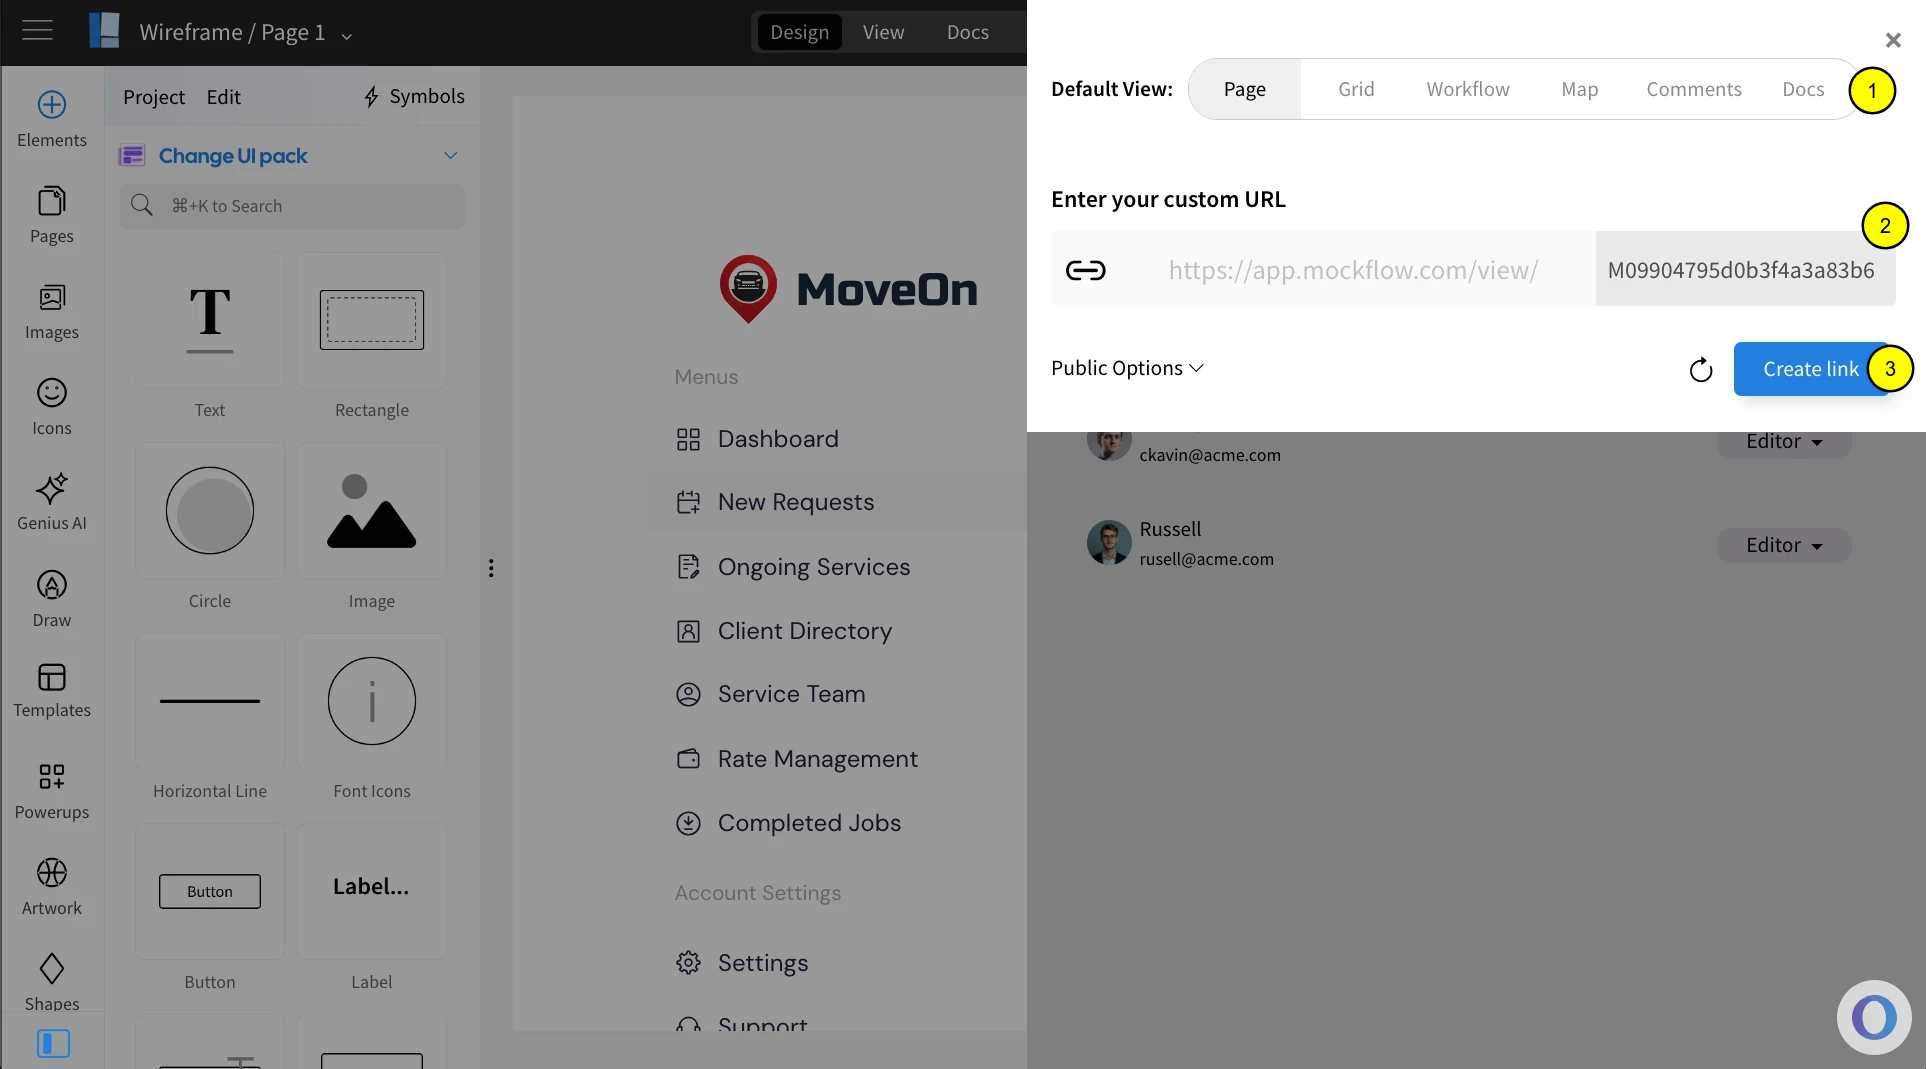
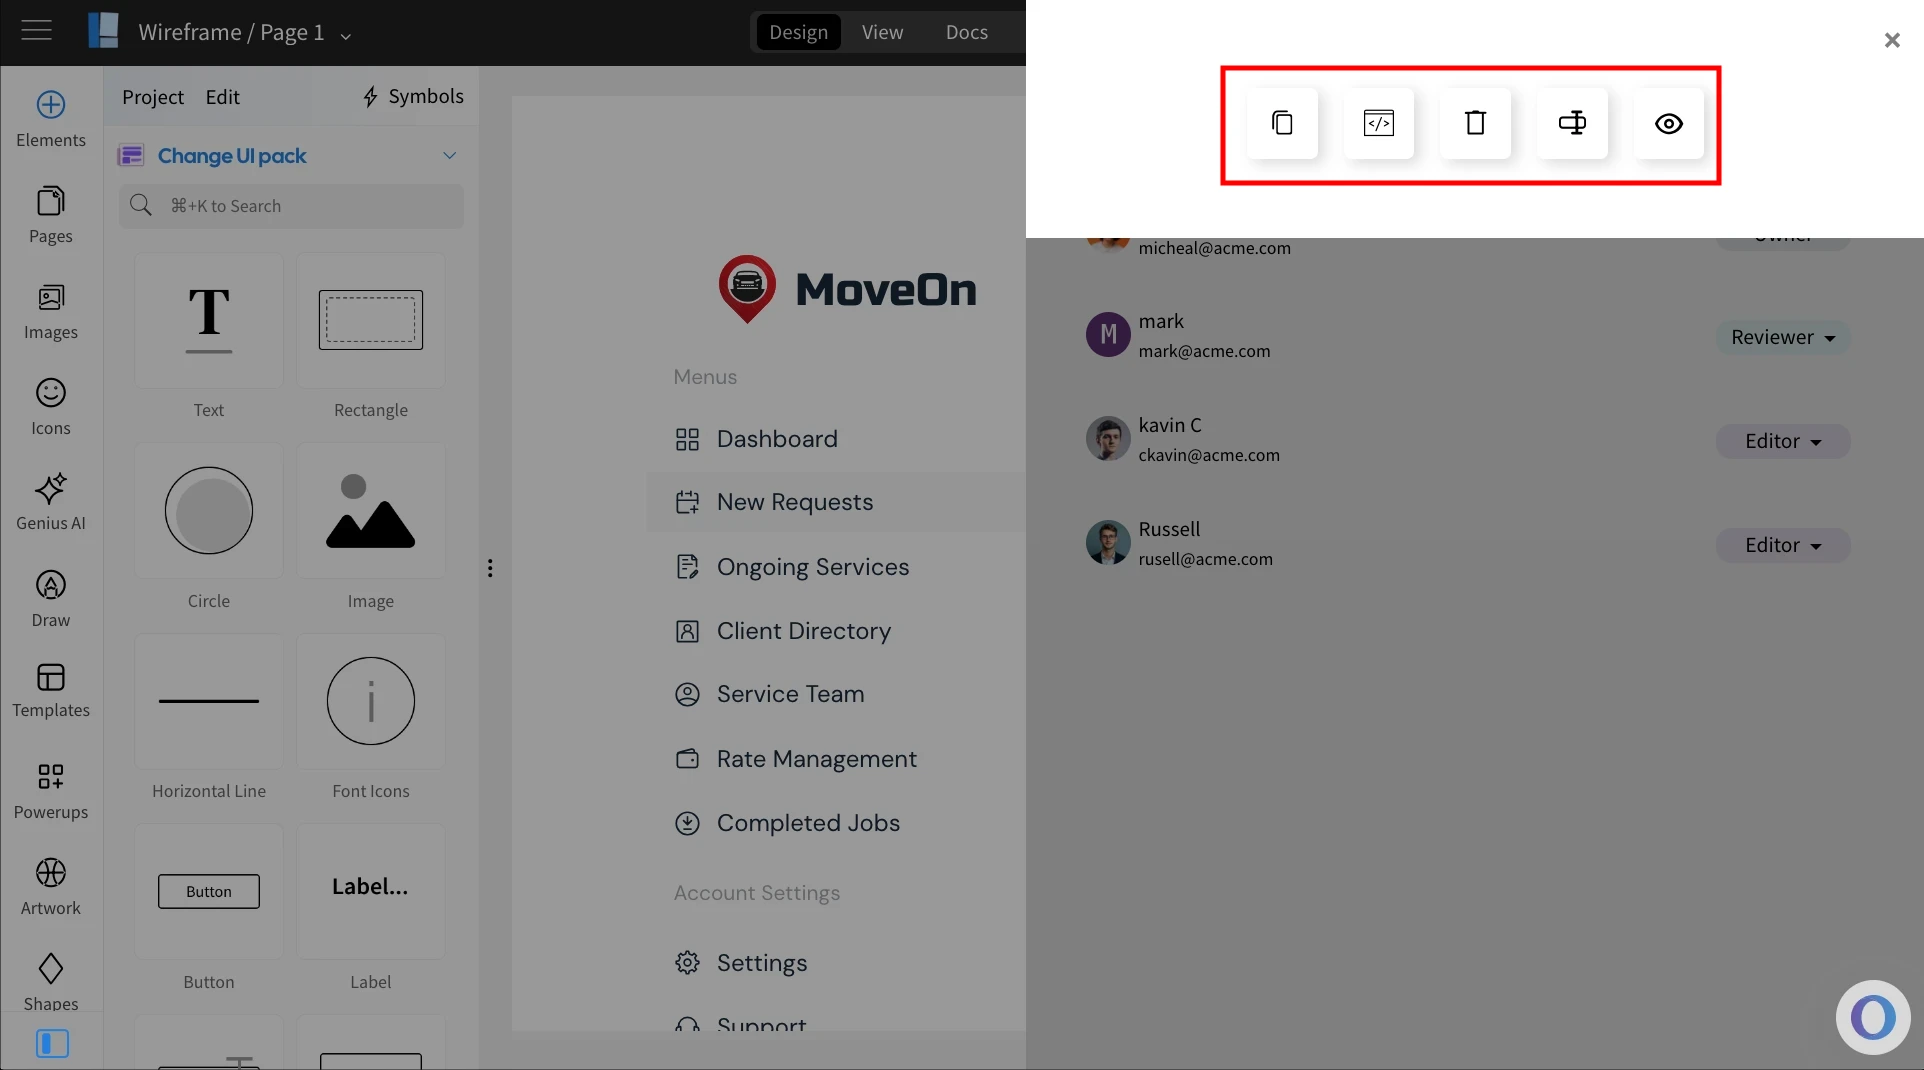
3Once the link is created, you’ll have options to copy, view, delete, embed, or edit the link URL.
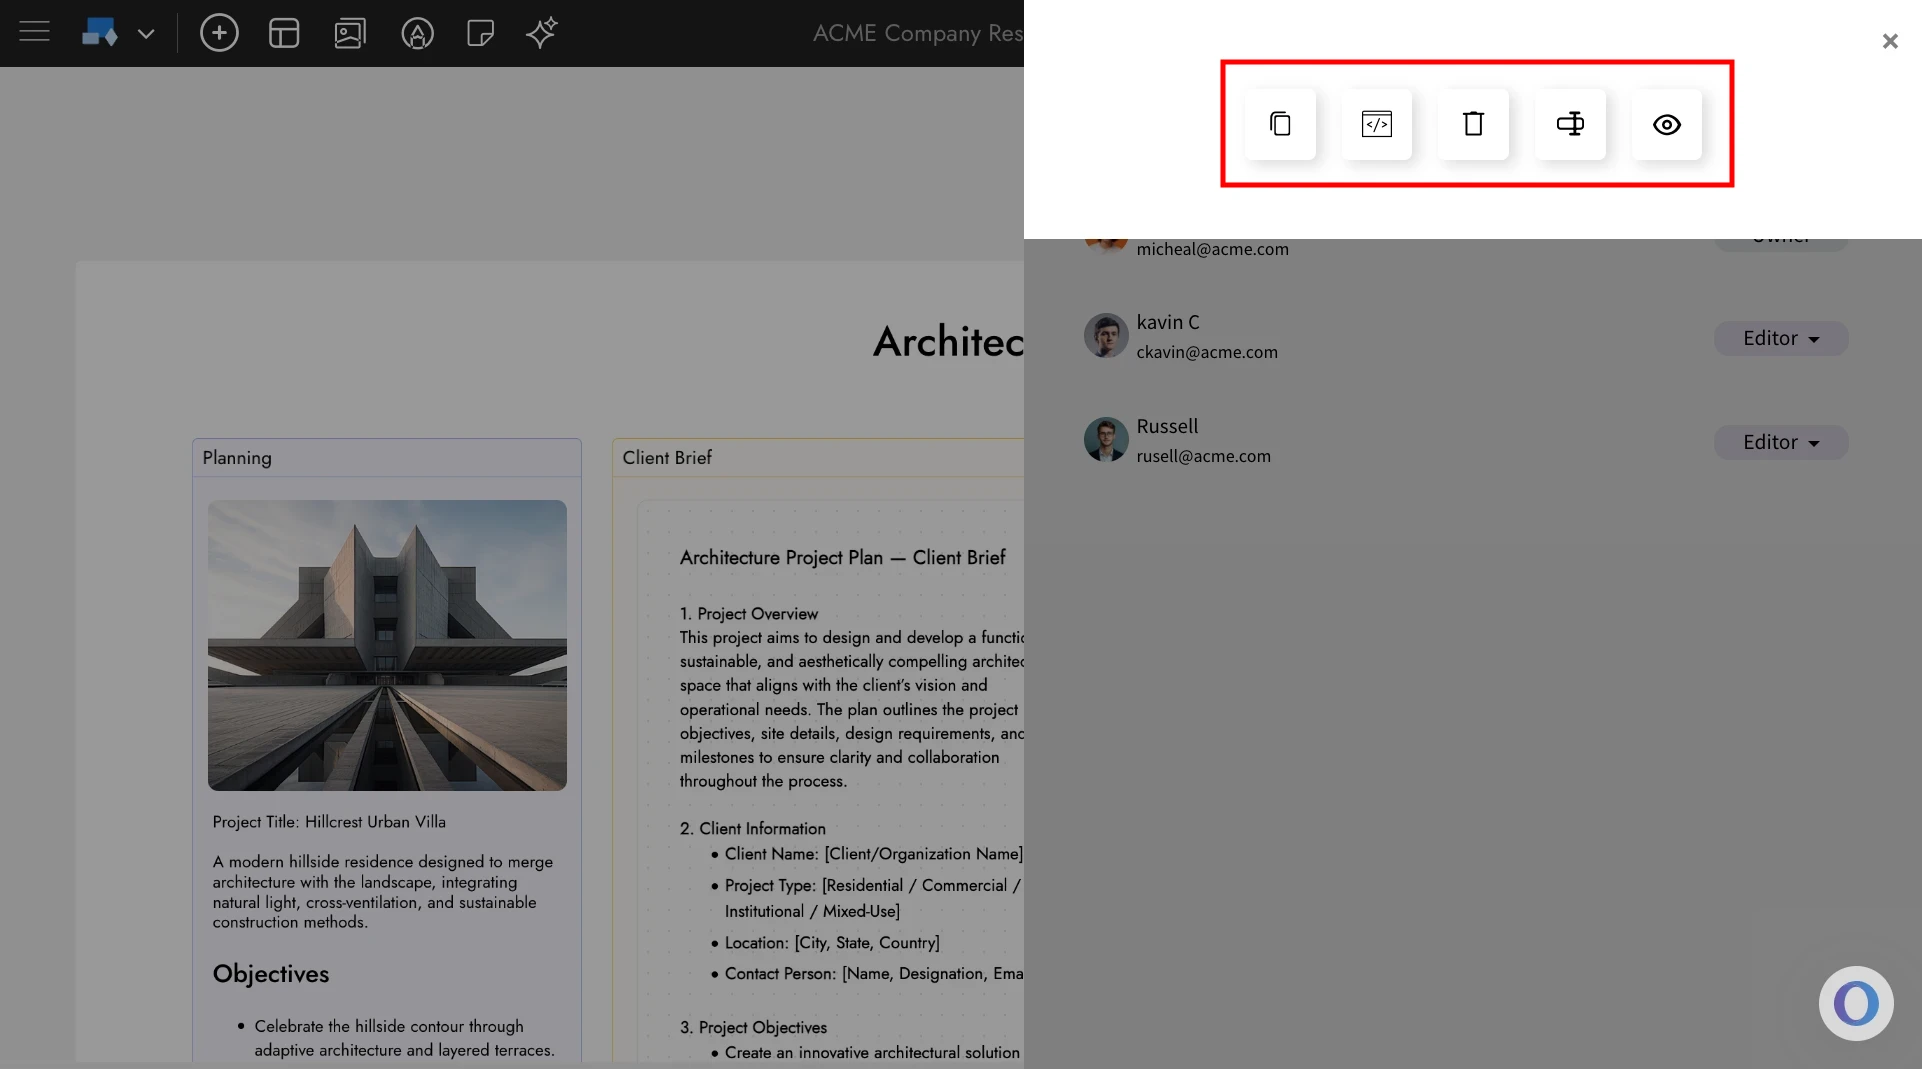
Sharing Boards inside the MockFlow IdeaBoard Editor.
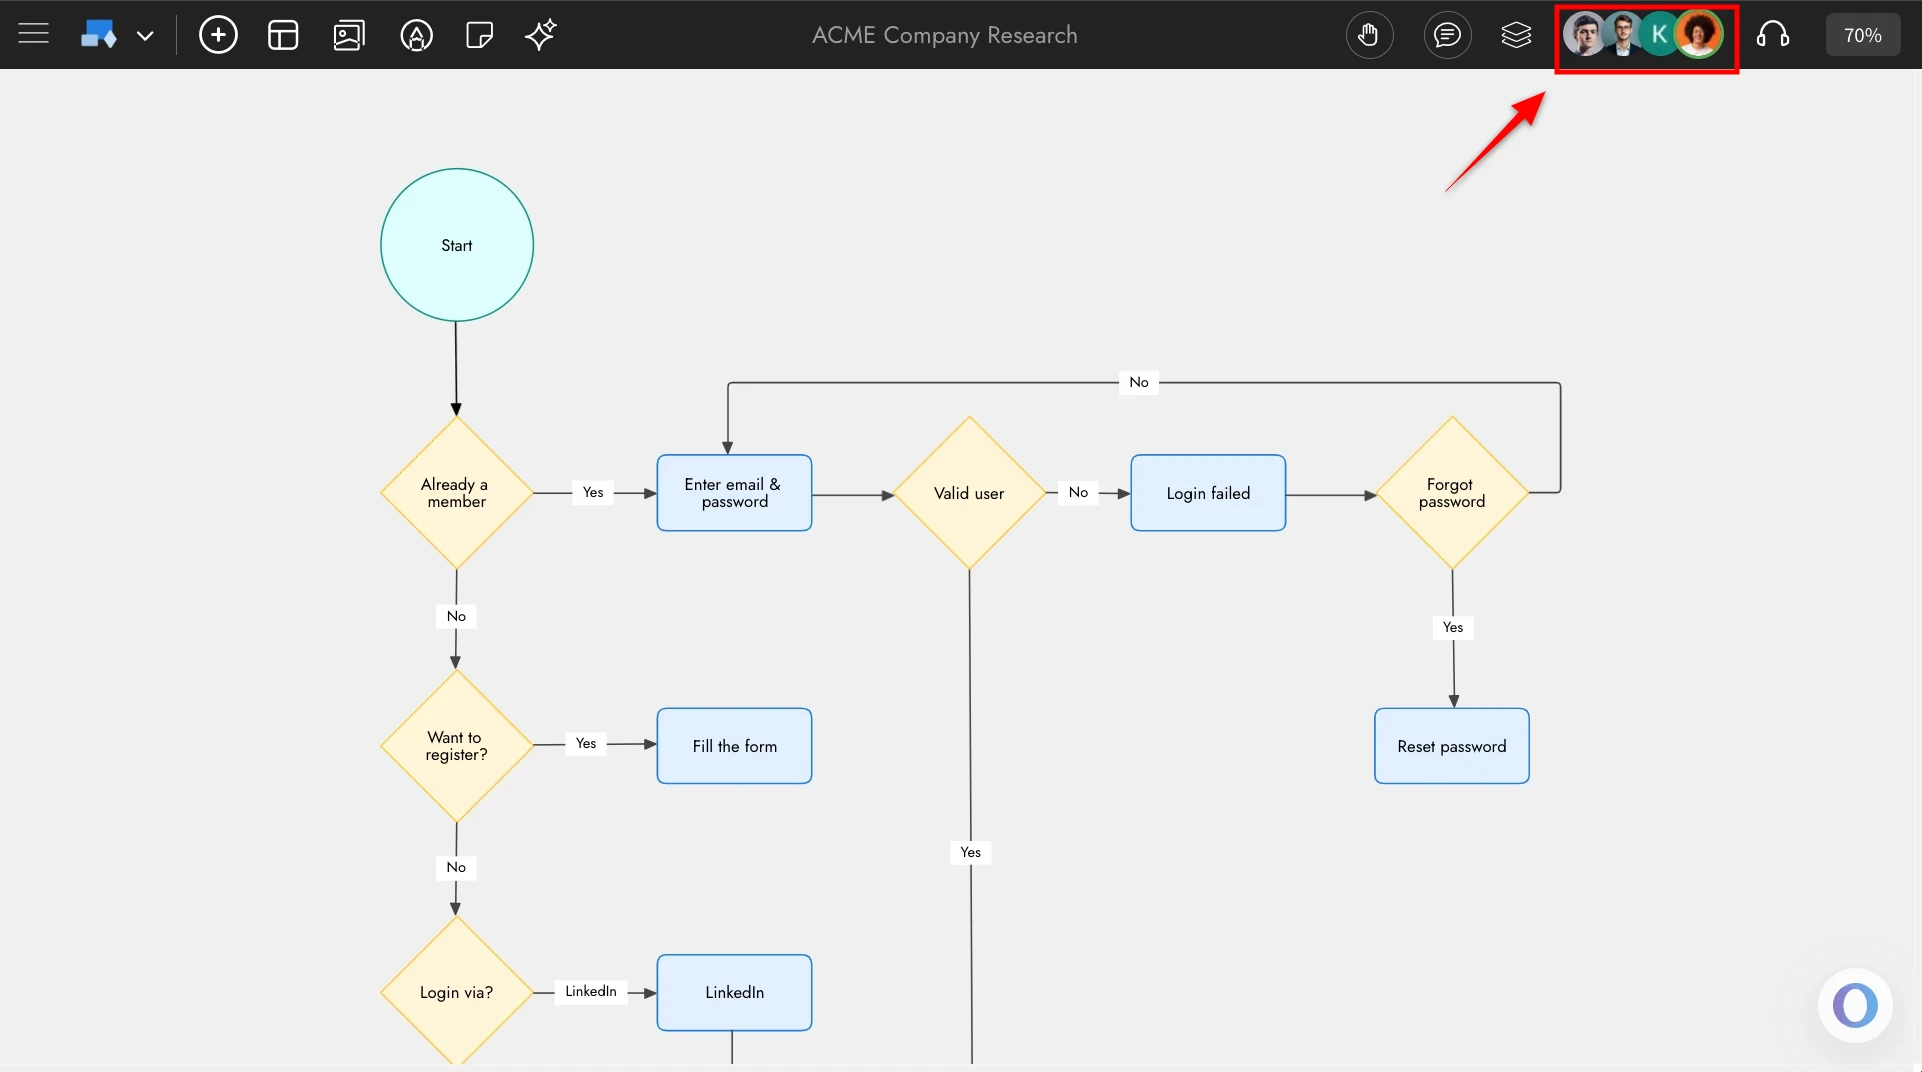
1In the MockFlow IdeaBoard editor, click Team Members from the top-right corner.
2Enter the email address of the member you want to add and select the role for the new member.
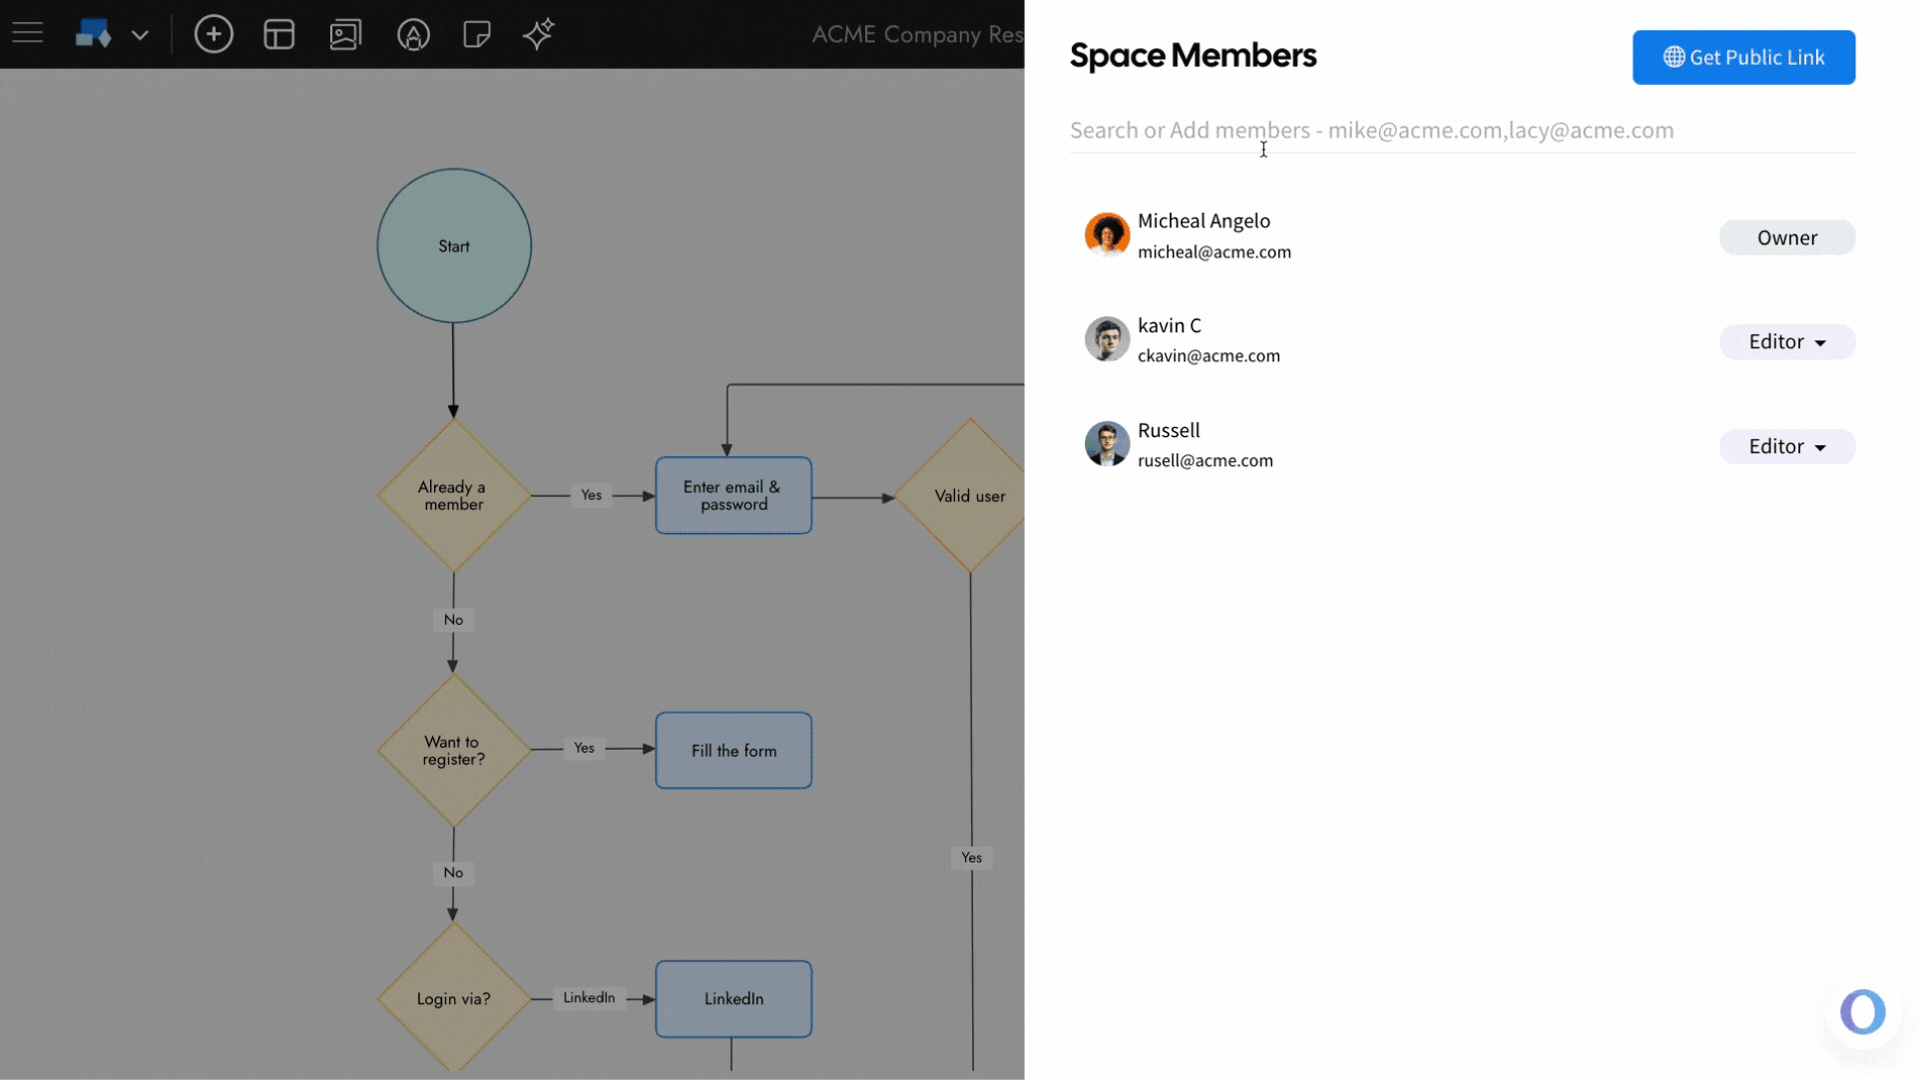
3The member will be added to the IdeaBoard editor, and you can change their role anytime using the role dropdown.
4You can also remove a member from the space using the remove option.
Generate Public Link for an IdeaBoard board
1To create a public link for a board, click Get Public Link from the Team Members panel.
2Customize the link settings as needed, then click Create Link.
3Once the link is generated, you will have options to copy, view, delete, embed, or edit the link URL.